
Craft 101: Handmade Pom Pom Ornaments
It's never too early to start working on Holiday crafts...
It took me approximately 30 minutes to finish two.
You'll need:
:: yarn (5-8 yards for each pom pom)
:: scissors
:: waxed thread or waxed dental floss (1' per pom pom)
:: ribbon/twine (for hanging) or you can use the same yarn if you don't have ribbon (5-6" for each pom pom)
:: patience
:: Christmas music in the background (optional)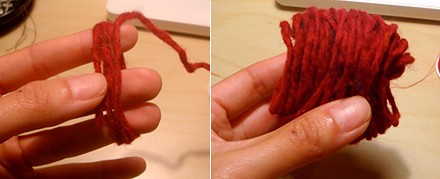
step 1. Begin by wrapping yarn around two or three fingers. The more fingers the bigger your pom pom will be and the more yarn you'll need to get the right amount of puffiness. You'll need a minimum of 5 yards, anything less and the pom pom comes out a little sad and bald. The more you make, the more you'll get the hang of it and you'll be able to sense if you have enough yarn wrapped around your fingers.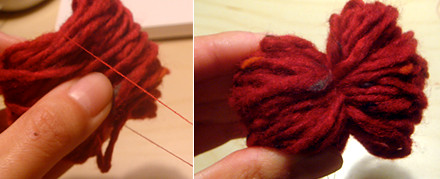
step 2. Carefully remove the wrapped yarn from your fingers and tie it tightly with dental floss (perpendicular to the side openings). Do this a couple of times and tie a knot each time you wrap it. Make sure you pull tightly each time and tie it as tight as you can! Don't cut the leftover floss just yet - you'll need it in step 3.
Here's another shot of this step: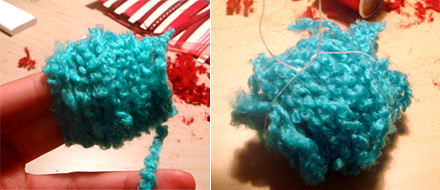
Now that the pom pom is secure, you now need to add whatever you'll be using to hang it. You can use ribbon, twine or just a piece of the same yarn doubled or tripled up.
step 3. I used a 5" piece of ribbon and folded it half. Take both of the end-edges and lay it parallel to the yarn grain. You should still have the floss from step 1 hanging, use this and wrap it around the ribbon and tie a knot. Do this a couple of times until you feel that it's secure enough. I'm sure you can also use some glue, but I didn't bother. These are pretty light so I don't think the ties will slip out (hopefully).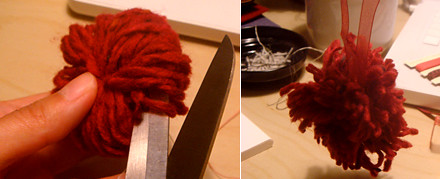
step 4. Cut the yarn all around. You'll notice that it will look a little scraggly and really not much like a pom pom. Don't fear... a couple more steps to go.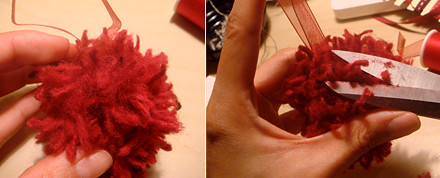
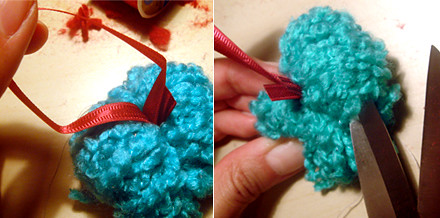
step 5. I like to call this step digging for lice - because it's about as tedious as hunting for lice (or so I've heard). Use your fingers to separate the fibers of each piece to get the pom pom nice and poofy. If you use bouclé (like my teal yarn), it's much easier - rubbing the yarn in between your fingers usually does the trick. If not, you'll have to pull the fibers apart. I'm sure you can use a fine felt brush if you have one but it really isn't that bad using your fingers.
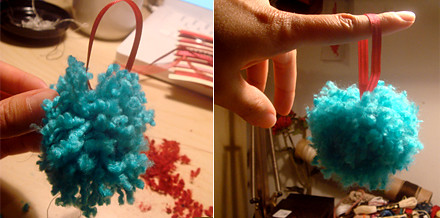
step 6. Once your pom pom is poufed out. Get all Edward Scissorhands on it and give it a nice trim. Don't get scissor happy though, or you'll end up with a mini pom pom. I suggest giving it a final trim once it's on the tree, because sometimes you end up turning it a certain way (just a thought!)
Here are some additional pics of each step...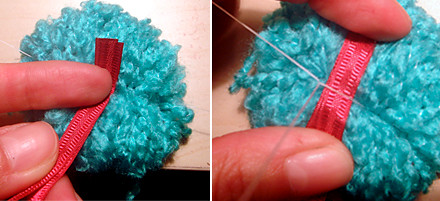


5 comments:
These are so cute! Thank you! Hey, we can make some together at Christmas time :)
xo
Melissa
These are SO cute! I think I'll do some in glitter yarn and make a garland! I'll be linking to this one!
I once made pom-poms for a football game this way. Time consuming, but AWESOME.
See, you make it look SO easy. But I guarantee, I try this, I have pom fuzz all over the house and a looped string with nothing attached :)
hi guys, sorry I've been M.I.A on the comments board... I'm working on a couple of new projects so it's been a little nuts over here - but I read every single one and each one still cheers me up! Just wanted to say hello to everyone and thank you for leaving such nice comments all the time!! :))
Post a Comment