
Craft 101: Recycled Catalog Notebooks
I just finished this mini project and thought I'd create a step-by-step tutorial and file it under "Craft 101". I think it would be nice to post a few handmade how-to's every now and then.
+++++++++++++++++++++++++++++++++++++++++++++++++++++++++++++++
If you would like to contribute to Craft 101 or have a tutorial on your site that you'd like to share, send me an email (subject: craft 101) and we'll take it from there!
+++++++++++++++++++++++++++++++++++++++++++++++++++++++++++++++
Recycled Catalog Notebooks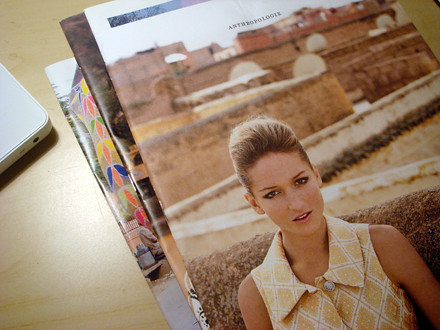
You'll need:
:: 31 sheets of scrap paper or catalog paper
:: Paper cutter
:: card stock
:: binder clips
:: Ruler
:: Pencil
:: Stapler
:: decorative paper
:: Bone folder
:: Double-sided tape
I used my Anthropologie and other catalogs that were stacking up instead of office scrap paper (since I don't work in an office). I chose catalogs that were printed on matte paper - I noticed that ink has a tendency to smudge on glossy paper (so no J.Crew paper!)
>> click here to expand & read full tutorial click again to hide
 You might want to reference the original source of this idea (Martha of course!) prior to starting the project.
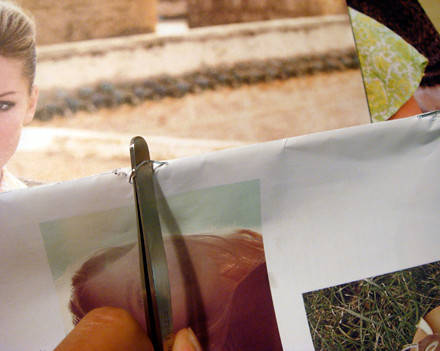
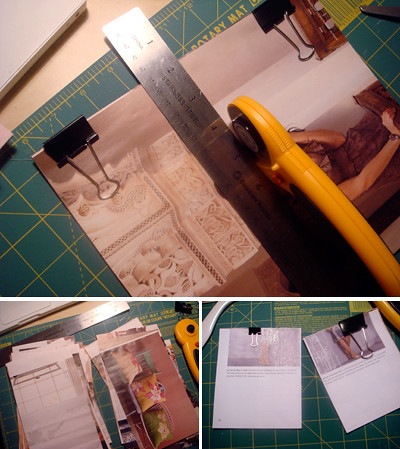 I decided to make mini notebooks, so after removing the staples I cut the pages into 8 pieces.
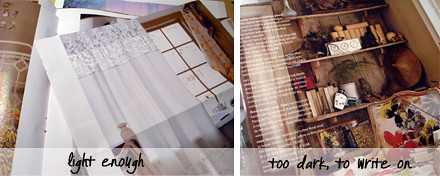
I also separated pieces that were too busy or too dark to write on. I used 31 pieces of paper per notebook - you can make it thicker or thinner (whatever your stapler can handle). I decided on 31 because I figured one page per day. Organize 31 sheets and make sure you arrange it so that the lighter sides are right side up. Make sure all the paper is aligned then secure with binder clips.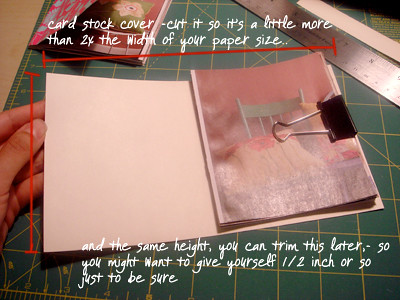
Cut the cover out of card stock. You can do this two ways - you can either cut 2 separate pieces, one for the front cover and one for the back cover. OR cut one piece that will wrap around your 31 sheets of paper. I opted for the latter, although I would probably recommend cutting 2 pieces if I had to do it again.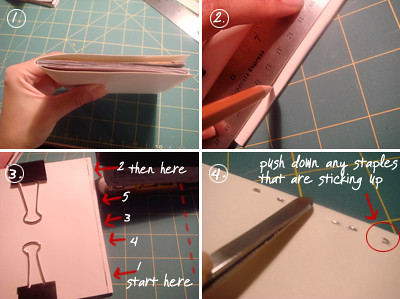
1. If you choose to do it my way, just make sure you push the pages as close to the spine as possible then clip the edges with binder clips.
2. Using a pencil and a ruler, draw a line from top to bottom, 1/8 inch in from the left edge as a guideline for the staples.
3. Staple down on the guideline. I like to staple the edges first then one right in the middle -
this assures that my staples are evenly distributed.
4. Turn it over and make sure you flatten down any staples sticking up.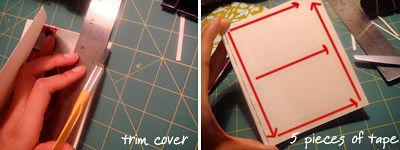
Trim the edges with a scissor or an xacto knife. Use double-sided tape to secure decorative paper to card stock. Make sure it do this one side at a time. Place 5 pieces of tape to the back cover, carefully line up the tape pieces to the edges so that it sticks to the decorative paper securely.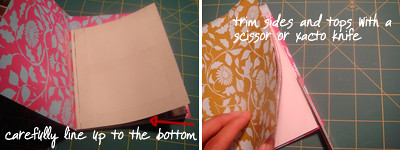
Cut decorative paper (I used double sided quality gift wrap paper), a little bigger than the size of the card stock. Unlike the card stock, this should not be cut into 2 separate pieces. Fold it in half. Press the stapled-together stack of 25 sheets of catalog paper and card stock cover against the middle of the decorative craft paper to create a book spine - without touching the sticky back cover just yet. Stick the sticky back cover to the decorative piece of paper once you're happy with the positioning (eyeing it up with air in between type of thing!) Trim excess paper with a scissor or an xacto knife.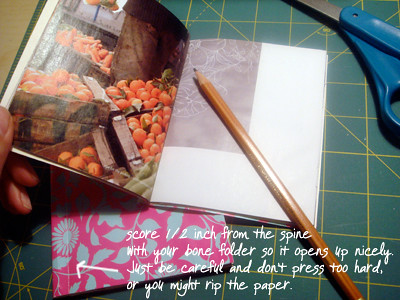
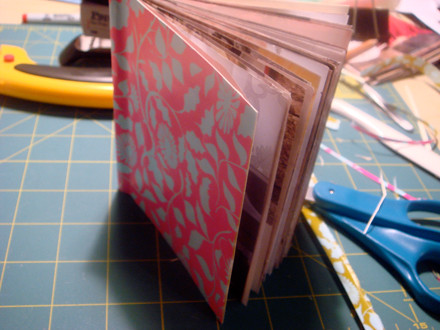
Score the covers with a bone folder, so it opens neatly. Just be careful, don't scrape or rip the decorative paper.
Let me know if you have any questions! Good Luck!
If you would like to contribute to Craft 101 or have a tutorial on your site that you'd like to share, please send me an email (subject: craft 101) and we'll take it from there!


4 comments:
oooo, I like this idea! thank you, thank you!
I'm looking for catalogues now!
This is a great blog with such a style!
i will add your blog to mine since im gonna visit a lot more!
:)
This is a great post. I’m glad it was bumped. Otherwise I would’ve missed these very useful information.
Regard
http://www.higrade.com
Post a Comment